Setting up your email account correctly is essential to ensure reliable communication, seamless syncing, and uninterrupted workflow within the app. Whether you’re using a business email through Microsoft Exchange, a personal Gmail account, or a custom SMTP configuration, this guide will walk you through the setup process step by step.
In the sections below, you’ll find tailored instructions for each email type. Simply choose the option that matches your email provider and follow the steps to get up and running quickly.
How to access e-mail configuration screen?
1. Click on the Hamburger Menu button (Top left corner)
2. Click on the System.
3. Click on Workstation Options.
4. Click on the Email Setup tab at the top.
Outlook / Microsoft Exchange
- In the 'Workstation Options', with Outlook / Microsoft Exchange selected in the "Email Type" field, enter your e-mail address into the "Username" field.
- Click on 'Connect Outlook Account'.
- On the 'Microsoft Pop-Up Screen', click on your Windows linked email address. If the Address is not showing or is incorrect, click on 'Use Another Account'.
- If your e-mail was already correctly listed, then you can select it, enter the password if prompted, and click 'Sign In'.
- Once the pop-up window disappears, click on the 'Save' button in Elite.
- You have successfully setup your email.
- If your address did not automatically populate, and you selected 'Add Another Account', you should see the below screen, where you need to enter the address that you want to login to, and then click 'Next'.
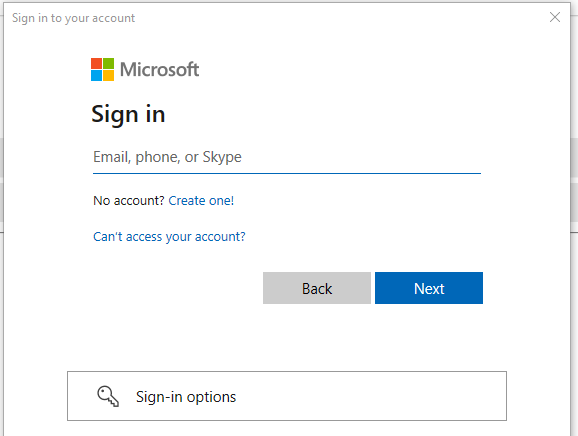
- Enter your password, and follow step 5.
- Congratulations, you have now setup your Microsoft Exchange account.
Note: Some versions of Windows might outdated, which causes the pop-up to read "Browser is Unsupported/Outdated". To remedy this, you will need to open your preferred browser (Google Chrome, Firefox, Edge) and then navigate to: https://go.microsoft.com/fwlink/p/?linkid=2125442 - where you will be logging into your Microsoft Account through the browser instead. Once you have done this, then you can start from Step 2 again.
Gmail / Google Account
- In the 'Workstation Options', with Gmail selected in the "Email Type" field, enter your Gmail address into the "Username" field.
- For the password, you will need to generate an "App Password" in your google account. (Note: The password to be entered here is NOT your gmail password)
- Please ensure 2-Factor Authentication is enabled on your Gmail account. (How To Enable: Turn on 2-Step Verification)
- Use the following link to navigate to the "App passwords" page: https://myaccount.google.com/apppasswords
- Once an App Password is generated, you will get a 16 character password, which would look like the following format: "wwww xxxx yyyy zzzz"
- This is the password that you will be using in Elite.
- Be sure to make note of the password, copy it, and paste it into the Elite application.
- Click "Save" at the bottom.
- Congratulations, you have now setup your Gmail account.
Note: The password to be entered in Elite for Gmail accounts is NOT your Gmail address password. You will need to enter an App Password which is generated in your google account, as mentioned in step 2-5).Other / SMTP (Advanced Settings)
- In the 'Workstation Options', with Other / SMTP (Advanced Settings)selected in the "Email Type" field, enter the following:
- Host Name/ Domain: Host Name/ Domain name provided by your email provider. Examples: smtp.office365.com or smtp.gmail.com.
- Email From: Enter your outgoing email address here.
- Port: 587 (Secure) or 25 (Unsecure)
- Username: The email address' username.
- Password: The password of the email address.
- Enable SSL Certificate: Checked.
- Click on the Save button.
- Congratulations, you have now setup your SMTP settings for your account.
- Note: If you are unsure what your SMTP settings are, please contact your email provider and communicate to them to assist with providing the correct information. They will also need to ensure that SMTP is enabled for your account.
Email Exchange
- If you make use of a different Exchange, such as Xneelo or Afrihost, then you will need to setup this section.
- In the 'Workstation Options', with Exchange selected in the "Email Type" field, enter your email address in the 'Username' field.
- Enter your password in the 'Password' field.
- Click the 'Save' at the button.
- Congratulations, you have now setup your Exchange account.
Note: Please ensure that SMTP is enabled for your exchange account.